











Designing a sustainable home no longer means sacrificing beauty. Modern energy-efficient houses are comfortable, stylish, and environmentally responsible. By focusing on a strong building envelope, passive design, smart window placement, and durable materials — and using tools like…
Structural Wood Remodeling Playbook: Framing, Deck Spans, Subfloors & CNC Precision
- Local Editor:Local Editor: The HOMEiA Team
- Category: Home Improvement
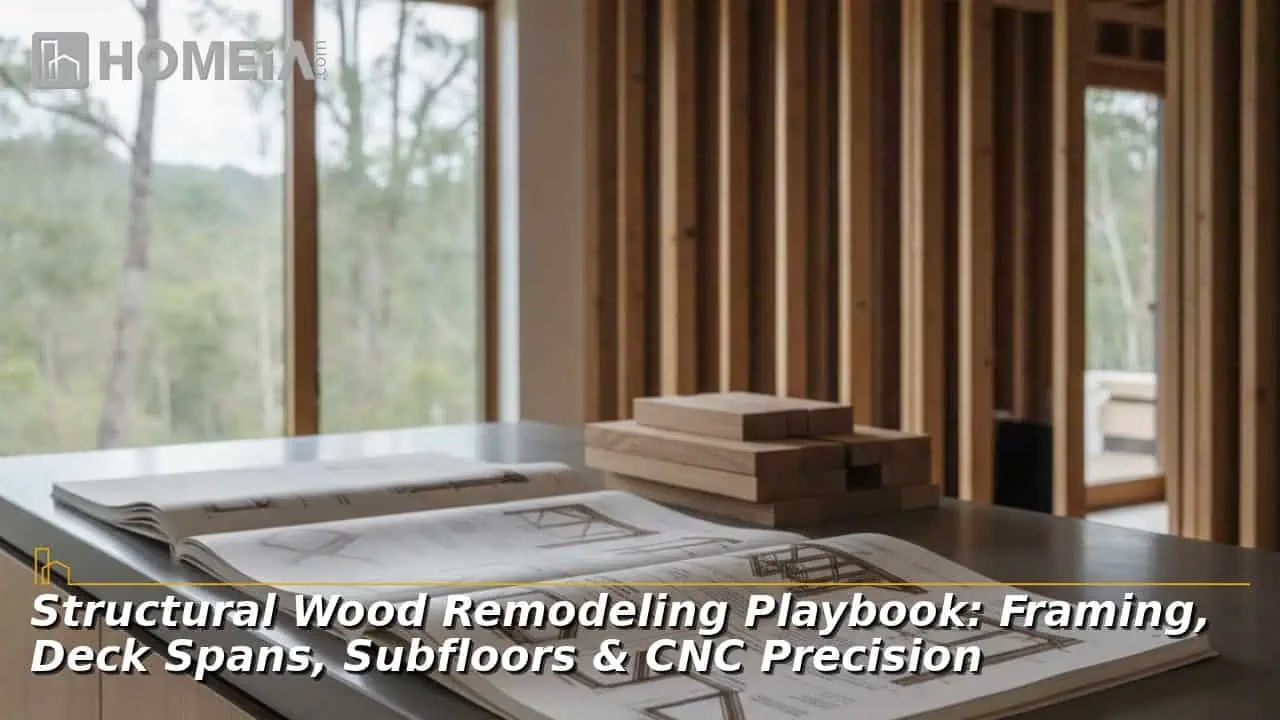
Home wood projects require careful planning, correct 12mm plywood thickness, and solid structural support to stay safe and look great. Removing a load-bearing wall costs nearly $550 for an engineering inspection, while building a deck needs proper post footings and joist spans, ideally using 2×8 boards spaced 16 inches apart. For indoor furniture or subfloors, 12mm Baltic birch plywood offers support against bending. Using precise measurements and the right tools for structural wood remodeling ensures every home improvement project stays safe, stable, and strong.

Related article
Furniture Material Comparisons of Leather vs. Fabric & Solid Wood vs. Engineered
Furniture materials determine durability, comfort, and long-term performance, yet many buyers focus only on appearance. Ignoring what lies beneath the surface can lead to costly mistakes. This guide compares the four most important furniture materials and includes a practical matrix to help you choose the best option for your lifestyle…
1. Load-Bearing Wall Removal: Tributary Loads and Structural Engineering Costs

Open-concept floor plans are a popular way to update a home and increase property resale value. However, before removing an interior wall, you must determine if it is a load-bearing wall, supporting ceiling joists, second-story floors, roof trusses, or a non-structural partition wall. Knocking down a load-bearing wall without installing a replacement beam is detrimental, causing sagging ceilings, bouncy floors, stuck doors, and dangerous structural damage.
A. Engineering Inspection and Permit Fees
Hiring a licensed structural engineer to evaluate house framing and create stamped plans is required by most city building departments. Engineering fees depend on how complicated the project is:
- Basic Visual Inspection: $350 to $800, with a national average of $550. This covers an hourly rate of $70 to $250 per hour.
- Load-Bearing Report and Wall Removal Plan: $500 to $1,000 for written engineering reports that explain support requirements.
- Stamped Engineering Plans and Official Drawings: $800 to $2,500, or roughly 7% to 10% of the total remodeling budget.
B. Sizing Replacement Beams and Understanding Weight
When a structural wall is removed, the vertical wall studs must be replaced by a horizontal beam like a Glue-Laminated timber (Glulam) or Parallel Strand Lumber (PSL) beam. This new beam is supported on each end by vertical post studs resting on a solid foundation.
To calculate the total weight (wtotal) the new beam must carry, engineers calculate the tributary floor and roof area:
| wtotal = Ltributary × (Dead Load + Live Load) |
In this formula, Ltributary is the tributary width, being half the distance to the next supporting wall on either side measured in feet. Dead load refers to the permanent weight of the building materials, usually 10 to 15 pounds per square foot. Live load refers to the weight of people, furniture, and belongings, set by building codes at 30 to 40 pounds per square foot.
For example, suppose you remove a 14-foot wall supporting a 12-foot wide section of floor area (Ltributary = 6 ft). If its combined floor weight is 50 pounds per square foot, the replacement beam must carry 300 pounds for every foot of its length (wtotal = 6 × 50). Across the entire 14-foot open space, this beam carries a total weight of 4,200 pounds without bending more than the legal safety limit. Temporary support walls, called shoring walls, must be built on both sides to hold up the ceiling until the new beam and vertical posts are completely installed.
Related article
The Custom Home Building Process: A Complete Step-by-Step Guide
Building a custom home may feel overwhelming, but it follows a clear, structured process. With the right team, each phase, from design to move-in, becomes manageable and rewarding. This guide walks you through every major step, helping you move forward with clarity, confidence, and control as you create a home tailored to your life…
2. Deck Structural Engineering: Spans, Beams, and Ledger Anchors
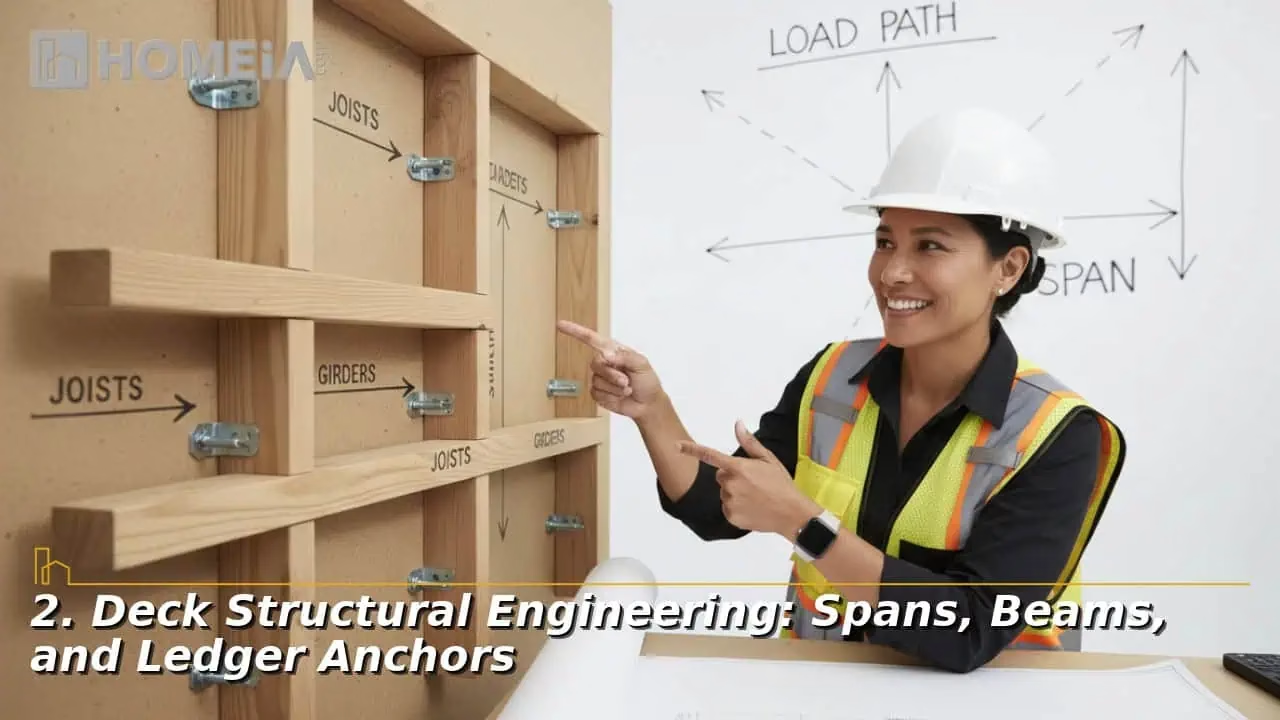
Building an outdoor deck provides an optimal area for relaxing, but outdoor timber framing must handle bad weather, changes in temperature, and heavy weight. Building a safe deck requires following strict wood span tables, concrete footing rules, and house connection schedules.
A. Framing Lumber Span Comparison
Deck frames built with pressure-treated Southern Yellow Pine (SYP) or Douglas Fir lumber must be sized based on board spacing and expected weight. Standard building codes require decks to support a live weight of 40 pounds per square foot plus a frame weight of 10 pounds per square foot.
Lumber Size | 12-inch Spacing | 16-inch Spacing | 24-inch Spacing | Max Overhang |
|---|---|---|---|---|
| 2×6 PT SYP | 9 ft 11 in | 9 ft 0 in | 7 ft 7 in | Up to 1 ft 6 in |
| 2×8 PT SYP | 13 ft 1 in | 11 ft 10 in | 9 ft 8 in | Up to 2 ft 1 in |
| 2×10 PT SYP | 16 ft 8 in | 15 ft 2 in | 12 ft 5 in | Up to 3 ft 1 in |
| 2×12 PT SYP | 20 ft 4 in | 18 ft 0 in | 14 ft 8 in | Up to 4 ft 0 in |
B. Concrete Footings and Ledger Board Fasteners
The weight from deck posts must pass into solid ground below the local frost line to keep winter freezing from lifting or cracking the deck. A minimum required size of a concrete pier footing (Afooting) is calculated using post weight and soil strength:
| Afooting = Ptributary ÷ Soil Capacity |
Standard clay and sand soils support an assumed baseline weight of 1,500 pounds per square foot. If a deck support post carries 3,000 pounds of weight, it requires a concrete footing area of at least 2.0 square feet (Afooting = 3,000 ÷ 1,500), which equals a round concrete pier about 19 inches wide.
Attaching the deck ledger board to the house frame is the vital connection in outdoor deck building. Nails must never be used to attach a ledger board because heavy weight can pull them out of the wall. Building codes require 1/2-inch hot-dip galvanized lag screws or heavy-duty expansion bolts driven through the ledger board and into the house rim joist. These bolts must be placed in a staggered, zig-zag pattern every 12 to 16 inches, protected by metal Z-bar flashing to keep rainwater from rotting the house wall.
Recommended for you
3. Subfloor and Cabinetry Mechanics: Deflection Tables and Material Selection

Whether installing large floor tiles, building custom kitchen cabinets, or assembling garage storage, wood flexibility dictates long-term performance. Selecting thin or weak wood panels leads to sagging shelves, cracked floor tile grout, and broken joints.
A. How Wood Bends Under Load
When a horizontal sheet of wood is supported on both ends, it acts like a bridge beam. According to Architectural Woodwork Institute (AWI) standards, the maximum allowable bending sag, called deflection, for cabinets and subflooring is limited to L/360, or a maximum bend of 6.4 mm (1/4 inch). Bending deflection (D) under an evenly spread weight (w) is calculated using this beam equation:
| D = ( 5 wL4 ) ÷ ( 384 EI ) |
In this formula, D is the bending sag in millimeters, w is the weight per millimeter, L is the unsupported span length, E is the stiffness rating of the wood species, and I is the panel shape rating, calculated as:
| I = ( bh3 ) ÷ 12 |
Because panel thickness (h) is cubed (h3) in this equation, even miniscule changes in panel thickness causes a massive change in bending strength. Standard 12mm Baltic birch panels allow factory manufacturing thickness variations of ±10% + 0.4 mm, meaning a 12mm sheet might actually measure between 10.4 mm and 13.6 mm thick. A panel at the thin end (10.4 mm) bends 33% more than a true 12.0 mm panel under the same weight!
B. Sheet Material Comparison
Sheet Grade | Density | 12mm 4×8 Weight | Stiffness (E) | Layers | Max Shelf Span |
|---|---|---|---|---|---|
| Baltic Birch (BB/BB) | 680–720 kg/m³ | 24.3 kg (53.6 lb) | 9,000–12,000 MPa | 9 | 750 mm (29.5 in) |
| Hardwood Ply (BB/CC) | 580–620 kg/m³ | 20.7 kg (45.6 lb) | 7,500–9,000 MPa | 5–7 | 600 mm (23.6 in) |
| Poplar Plywood | 400–450 kg/m³ | 15.3 kg (33.7 lb) | 5,500–7,000 MPa | 5 | 450 mm (17.7 in) |
| Softwood Ply (C+/C) | 480–540 kg/m³ | 18.2 kg (40.1 lb) | 6,000–7,500 MPa | 5 | 500 mm (19.7 in) |
For heavy floor subfloors or sturdy cabinet shelves, choosing 12mm Baltic birch plywood provides ideal bending resistance (E ≈ 10 GPa) and reliable internal layers without air gaps. When installing tile subfloors, spacing floor joists at 16 inches on center using dense 9-ply birch panels keeps the floor flat and prevents tile grout from cracking.

Related article
Personalized Wall Art Ideas: Turning Photos, Quotes, and Memories into Decor
Personalized wall art turns blank walls into meaningful expressions of your life and style. By showcasing photos, quotes, and memories, custom decor adds warmth and intention beyond generic prints. This guide explores creative ideas, layout tips, and sourcing options to help you design wall displays…
4. Digital Fabrication: CNC Feeds, Speeds, and Tooling Setup

Modern woodworking is moving rapidly toward computer-controlled router cutting, known as CNC machining, to create pre-cut cabinets and custom furniture. However, cutting multi-layer plywood on a computer router requires setting the correct motor speed and feeding pace so the cutting bit does not overheat, chatter, or tear the wood edges.
A. Calculating Router Speeds and Chip Size
The primary equation used to calculate CNC router movement is the linear feed rate formula:
| Feed Rate = RPM × Z × cz |
Here, Feed Rate is how fast the machine moves in millimeters per minute, RPM is how fast the bit spins in revolutions per minute, Z is the number of cutting blades on the bit, and cz is the target wood chip thickness per tooth in millimeters. Moving a router bit too slowly makes the metal blades rub against wood fibers rather than slicing chips. This creates friction heat that burns the timber and dulls the cutter.
For example, when cutting all the way through a 12mm Baltic birch panel using a 6mm solid carbide two-blade compression bit spinning at 18,000 RPM with a recommended chip thickness of 0.40 mm, the correct cutting speed is calculated as:
| Feed Rate = 18,000 × 2 × 0.40 = 14,400 mm/min |
Running the CNC machine at 14,400 millimeters per minute (roughly 14.4 meters per minute) ejects wood chips smoothly, keeps the metal bit cool, and creates clean edges across the panel.
B. Router Bit Selection and Corner Shape Rules
Cutting smooth plywood panels requires selecting the right bit shape. Standard up-cut bits pull wood chips upward, tearing the top surface veneer. Down-cut bits push chips downward, leaving a smooth top surface but fraying the bottom layer.
Compression router bits solve this problem by combining an up-cut spiral on the bottom tip with a down-cut spiral on the top shank, squeezing wood fibers inward producing clean edges on both sides.
When creating computer drawing files (CAD vectors) for custom cut-to-size wood orders, you must account for tool width. Ordering custom cutouts through custom timber suppliers like Cut My uses standard 3mm diameter router bits. Doing so creates a physical limit of a sharp 90-degree square inside corners being impossible to cut.
Every inside corner cut by a 3mm router bit retains a 1.5mm rounded curve. If your project requires square pegs or interlocking cabinet joints to fit together, computer drawings must account for small rounded notches, called “dog-bone” or “T-bone” fillets, at every inside corner.

Related article
5. Summary Checklist for Homeowners and Builders
Completing structural home remodeling, outdoor deck building, and custom furniture projects requires balancing safety codes, weight calculations, and material choices. Following a simple step-by-step checklist keeps your home improvement projects safe and successful:
- Check Wall Framing: Inspect attic roof joists before removing interior wall studs. Hire a structural engineer ($350 to $800) to calculate weight loads and draw permit plans for wall openings wider than 6 feet.
- Follow Deck Rules: Size pressure-treated SYP frame joists according to building code span tables (2×8 joists max span 11 ft 10 in at 16-inch spacing). Fasten house ledger boards using 1/2-inch galvanized lag bolts staggered every 12 to 16 inches, backed by metal wall flashing.
- Control Wood Sag: Calculate expected weight on shelves and floor panels. Pick high-density 12mm Baltic birch plywood (680 kg/m³, 9 layers) for heavy loads to keep bending sag below the 6.4 mm safety limit.
- Set Router Speeds: Calculate exact chip loads (Feed Rate = RPM × Z × cz) when preparing computer cutting files. Use compression bits to prevent surface fraying and include 1.5 mm rounded corner offsets or dog-bone fillets in your CAD drawings when ordering pre-cut wood panels.
Conclusion
Successful home remodeling comes down to proper planning, correct math, and using the right timber materials. Whether you open up living spaces, constructing outdoor decks, or building custom cabinets, following engineering limits protects your home. Investing in structural engineering inspections, quality pressure-treated wood, and precision plywood ensures your improvements stay safe, beautiful, and valuable for decades.
Recommended for you




FAQs About Structural Wood Remodeling Playbook
1. How can I tell if an interior wall is load-bearing before cutting into it?
Look in your basement or attic to see if floor joists or roof trusses run perpendicular to the wall. Walls positioned directly over foundation beams, support posts, or other walls on lower floors are usually load-bearing.
2. Why does my subfloor squeak or feel bouncy, and how can I fix it?
Squeaks occur when subfloor panels rub against framing nails or adjacent boards. Bounciness happens if joists are spaced too far apart or if panels are undersized. Adding solid wood blocking between joists and securing panels with subfloor screws and construction adhesive fixes movement.
3. Can I use standard untreated lumber for deck framing if I stain or seal it?
No. Standard untreated lumber quickly rots and attracts wood-destroying insects when exposed to outdoor humidity and ground moisture. Outdoor deck framing requires pressure-treated wood or naturally rot-resistant species like cedar or redwood.
4. What is the difference between nominal and actual lumber dimensions?
Nominal size is the rough board dimension before planing at the mill, while actual size is the final dried product. For example, a nominal 2×4 board actually measures 1.5 x 3.5 inches. Structural span calculations always use actual dimensions.
5. How do I protect plywood edges from moisture damage in kitchens or bathrooms?
Exposed plywood edges absorb water up to 20 times faster than face veneers through capillary action. Seal raw edges using iron-on wood edge banding, clear polyurethane varnish, or waterproof epoxy sealant before installation in damp rooms.
Share