17 Key Steps to Install Laminate Flooring
- Local Editor:Local Editor: The HOMEiA Team


Key Steps to Install Laminate Flooring: It’s durable and beautiful and can work with any décor, but one of the best things about laminate flooring is that many people can install it on their own. If you have a weekend, a little finesse, and a good attitude, you too can install your own laminate floor.
Here are 17 key steps to install Laminate Flooring for the first time:
1. Choose your flooring.

Most of the laminate flooring today is made for floating installation, meaning that it does not need to be glued down or secured to the floor. Instead, it snaps together using a tongue-and-groove system.
It comes in a wide range of styles, which can mimic tile, wood, and more. It can also vary in its construction, including the thickness of the planks and whether underlayment is integrated into the product.
Related article
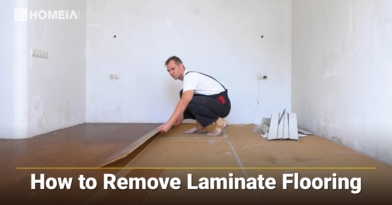
10 Steps to Remove Laminate Flooring
Laminate is a popular flooring choice today. It comes in many colors and textures, it is durable, and it is easy to install. There may come a time, though, when you want to replace the existing laminate floor with something new…
2. Calculate how much you’ll need.

Measure the length and width of the room to determine the square footage you will be covering. You’ll need a little more than this to account for cutting pieces to size, making mistakes, or accommodating damaged materials. Experts usually recommend adding 5-10% to your calculation for the waste factor.
According to LuxHeat, one of the top-selling floor heating brands on Amazon, this is also the right time to measure and plan your floor heating system, if you plan on installing one. Floor heating is paired with laminate more often than you might think.
Next, find the square footage measurement on the box of laminate flooring. Divide your square footage by that amount, and then round up to the nearest full box.
3. Let the flooring acclimate.

It’s an easy step to skip, but if you want to do the job right, you’ll need to let the new flooring sit in the room for 48 hours or more. Why? Because it will give the materials time to acclimate to the humidity and temperature in the room, so they won’t shift and warp after installation.

Related article
10 Economical Flooring Options to Update your House and Add Value
Flooring comes in many styles and options, so you can easily find a variety of ways to keep the costs down while enhancing the value of your home in the process. Here’re 10 options for budget-friendly flooring that will help you keep the full cost of flooring replacement under control…
4. Gather your tools.

Installing laminate doesn’t require a lot of specialized tools—just a few basic items. The most important are something to cut the planks with (a saw) and a way to nudge them tightly into place.
Laminate flooring is fairly easy to cut. You can use a miter saw, circular saw, table saw, laminate cutter, or even a hand saw. In any case, though, consider using a diamond blade to make sure it can cut through the material without damage.
For placing the panels, you will need a rubber mallet or a tapping block and hammer. A pull bar will be useful for the final row.
You will also need some basic items: safety gear, a tape measure, a pencil, a utility knife, and a hammer can all come in handy. Duct tape is useful in marking boards to cut and preventing chips.
5. Remove existing trim.

To remove the baseboards, first run a utility knife along the top edge, next to the wall, to break through anyplace that may have sealed closed with paint. Then use a pry bar to gently pull the trim from the wall.
Recommended for you


6. Prepare the floor for the new boards.

You’ll need to prepare a hard, smooth surface for the new floor. In some cases, you may be able to work on top of existing flooring, such as vinyl. In other cases, you’ll need to pull up the carpet or the floorboards to reveal the subfloor underneath.
The subfloor needs to be in good shape: level and smooth. If you’re working with a concrete floor, use a patching compound to smooth out any chipped or cracked areas. If you have a wood subfloor, make sure the wood is in good shape.
You’ll need to replace any boards that show signs of rot or damage. Remove any protrusions, such as nails, and sweep and vacuum to pick up any chips.
7. Install intermediate layers.

To even out the subfloor and dampen vibrations, lay down a foam underlayment. Some underlayment comes with a vapor barrier layer, which you’ll need if you’re flooring a wet or very humid area. If it’s not part of the foam, you can install a separate vapor barrier layer.
In most cases, you can simply place the underlayment on the ground. Don’t overlap the seams, because it can make the surface bumpy, but you can duct tape pieces together if it’s helpful in getting the underlayment to lay flat.
When using laminate planks that have an integrated foam layer, you may be able to skip the separate underlayment.

Related article
The Best 10 Ways to Maintain Your House
Your house is most likely the most expensive purchase of your lifetime — and a safe haven that provides a hub for everyday activities, relaxation and making memories. It doesn’t remain in great shape without some effort, but with some loving care and an organized maintenance schedule, you can manage the upkeep without added stress…
8. Trim the door jambs.

The trim around the door can be difficult to remove and have a complicated shape, so the easiest solution is to make sure there is enough room for the flooring to slip under it. If you need to make room, use a hand saw or jamb saw to remove just enough material for the plank to slide underneath.
9. Decide on your layout.

Choose your starting wall; you will lay the boards parallel to it. This is usually the longest, straightest wall, but you may also choose the focal point of the room (such as a wall with a fireplace).
Measure perpendicular to this wall and divide by the width of the panels to determine how many rows you will need. The remainder is the width of the final row, and you will need to cut the last row of planks to this width.
Make sure your last row is at least two inches wide. If it isn’t, add half of the narrow width to half of a normal width. Use the resulting measurement as the width for both the first row and the last row.

Related article
20 Clever Ways to Increase the Value of Your Home
If you’re thinking of selling your house, you’re undoubtedly also thinking about the value of your home and how the market will treat you in terms of a reasonable selling price. We’ll discuss here some ideas for minor to moderate…
10. Prep the first row of planks.

Calculate how many planks you will need for a row by measuring the length of the room and dividing by the length of one plank. Because the first row will abut the wall, it may be helpful to cut the tongue edge off the planks in the first row. You can cut the last board at this time, if you wish, but it may be easier to mark the proper length once you’ve laid the first row.
11. Place the first planks.

Finally, you’re ready to lay the first planks. Start in the corner of the room and work along the first wall. You’ll need to keep a gap—about 3/8 inch—around the edges of the room to let the flooring expand.
You can keep this gap by placing spacers between the planks and the wall. Make sure each board lies flat and snug against its neighbor, using a rubber mallet or tapping block and hammer as needed.
Recommended for you


12. Cut the final piece in the first row.

To measure the final partial piece for a row, flip the board over, place it flush with the wall, and mark it where the next board begins. Cut the board at this mark, then place it at the end of the line.
13. Stagger the rows.

To create an attractive staggered appearance for your floorboards, don’t start every row with a full piece. Instead, start the second row with a half panel, and the third row with a quarter panel. Continue this pattern throughout the room.
If efficient use of your materials is more important to you than a precise pattern, after the first three or so rows, you can begin using the most recent cut panel to start the next row.

Related article
What’s Up with 5G for Your Home?
Have you heard? 5G is going to revolutionize everything and launch us into a tech utopia! No, wait—it’s going to mean the downfall of human civilization! Or maybe, like almost every new technology, it will be worse than we hope but better than we fear. So, let’s leave that debate for another day and discuss what you really want to know…
14. Lay the bulk of the flooring.

Now that you have a starting row, it’s time to add a second. Starting with the partial plank you just cut, place the tongue into the groove (at about a 45-degree angle), then push it down into place. Use a rubber mallet to make sure the new board is flat on the floor and snugly joined.
It may help to use another cut piece, sliding it into the groove at an angle and hitting it with the mallet, since it’s difficult to tap the panel laterally when it’s flush with the floor.
Repeat the process for the second row over and over until you’ve covered the entire floor—minus the final gap at the wall.
15. Cut and place the last row.

Unless you’re very lucky, the last row of planks will need to be cut the long way. Measure them as you did at the ends of the rows, by flipping them and marking where they overlap with the existing boards. In order to tighten the last row, you’ll need to use a pull bar to pull each plank into place.

Related article
12 Common Kitchen Layout Mistakes to Avoid
If you intend to stay in your home, but your kitchen doesn’t fit your lifestyle and add enjoyment to the time you spend there, it’s time for a renovation. Updating a kitchen takes a lot of planning, and it’s easy to overlook some crucial things—especially in the layout. Here’s a list of common kitchen layout mistakes and how to avoid them.
16. Reinstall trim and transition pieces.

Using a nail gun (or a hammer and nails) to reinstall the trim you removed. Reinstall transition strips (or place new transition strips) where the new laminate flooring meets other surfaces. Transition strips usually have a metal track that attaches to the floor, and a decorative piece that snaps on top.
Finally, add a line of shoe molding around the edge of the room. This will cover the expansion gap you left, giving the room a finished appearance. Caulk and paint the trim as needed.
17. Clean up.

Put away all the tools, properly discard materials, and sweep the space. Because no adhesive is involved, you can move furniture back into the room and start using it right away. Laminate flooring is among the most user-friendly flooring to install. The steps here will set you on your way to installing a floor that looks beautiful and professional.


Share